Introduction
Adobe Photoshop is one of the most powerful tools for photo editing, graphic design, digital art, and visual content creation. However, the large number of tools, menus, panels, shortcuts, and advanced features can make Photoshop difficult to learn, especially for beginners.
The good news is that you do not need to master every Photoshop feature to create professional-looking results. Learning a few practical Adobe Photoshop tips and tricks can make editing faster, easier, and more organized.
Whether you are a beginner learning Photoshop for the first time or a professional looking to improve your workflow, simple techniques such as using layers, keyboard shortcuts, masks, adjustment layers, Smart Objects, and AI-powered features can save time and improve editing quality.
In this guide, we explore useful Photoshop tips for beginners and professionals, including photo editing techniques, layer management, background removal, retouching, color correction, AI tools, and workflow improvements.
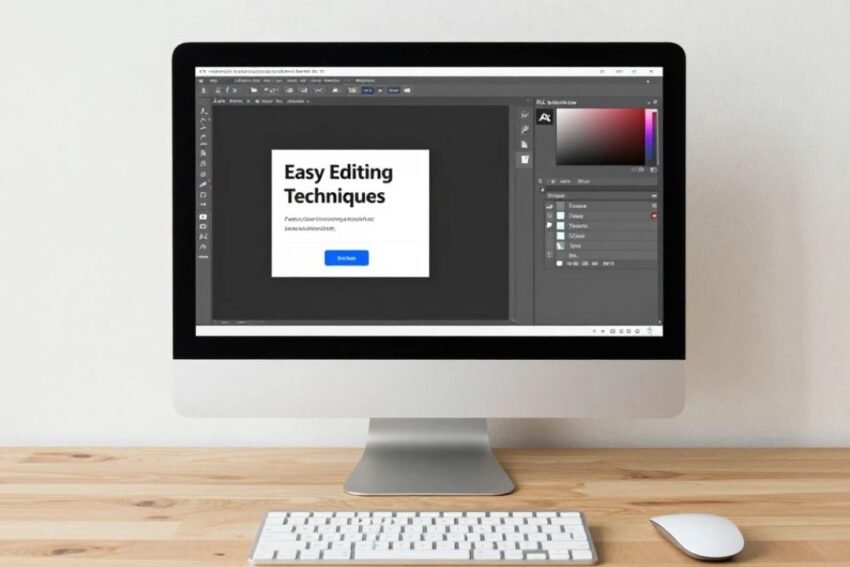
Learn the Photoshop Workspace
Before editing photographs or creating designs, it is important to understand the Photoshop workspace.
The main areas include:
- Tools panel
- Options bar
- Document window
- Layers panel
- Properties panel
- Color controls
- Menu bar
Beginners should spend some time exploring these areas.
Understanding where tools and settings are located can make Photoshop easier to navigate and reduce the time spent searching through menus.
1. Learn Essential Keyboard Shortcuts
One of the easiest ways to speed up Photoshop is learning keyboard shortcuts.
Common shortcuts include:
- Ctrl + Z — Undo
- Ctrl + C — Copy
- Ctrl + V — Paste
- Ctrl + S — Save
- Ctrl + T — Free Transform
- Ctrl + J — Duplicate Layer
- Ctrl + Shift + N — New Layer
- Ctrl + 0 — Fit image to screen
- Ctrl + + — Zoom in
- Ctrl + – — Zoom out
On macOS, many of these shortcuts use the Command key instead of Control.
You do not need to memorize every shortcut. Start with the commands you use most frequently.
2. Always Work With Layers
Layers are one of the most important Photoshop concepts.
Instead of making all changes directly to the original image, separate different elements into layers.
For example, a design can have separate layers for:
- Background
- Main photograph
- Text
- Shadows
- Graphics
- Color effects
Using layers gives you greater control over your project.
You can hide, move, resize, edit, or delete individual elements without affecting everything else.
3. Use Layer Masks Instead of Erasing
Beginners often use the Eraser Tool to remove parts of an image.
Although the Eraser Tool can be useful, layer masks are usually more flexible.
A Layer Mask allows you to hide parts of a layer without permanently deleting the original pixels.
Black hides an area, while white reveals it.
This makes layer masks useful for:
- Background removal
- Image blending
- Selective editing
- Compositing
- Creative effects
If you make a mistake, you can simply paint the mask again instead of rebuilding the image.
4. Use Adjustment Layers for Color Editing
Adjustment Layers provide a non-destructive way to change an image.
Instead of permanently changing pixels, you can create adjustments that remain editable.
Useful adjustment layers include:
- Brightness/Contrast
- Levels
- Curves
- Hue/Saturation
- Color Balance
- Black & White
This is especially helpful when working on professional photographs.
If the result is too bright, too dark, or too colorful, you can return to the adjustment layer and modify it.
5. Master the Curves Tool
The Curves tool is one of the most powerful Photoshop features for controlling brightness and contrast.
It allows you to make precise changes to different tonal areas.
You can use Curves to:
- Brighten shadows
- Darken highlights
- Increase contrast
- Create a softer appearance
- Improve overall tonal balance
Beginners can start with small adjustments instead of making dramatic changes.
Subtle editing often produces more natural results.
6. Use Smart Objects
Smart Objects are useful when you need to resize, transform, or repeatedly edit an image while maintaining flexibility.
For example, designers can use Smart Objects in:
- Product mockups
- Social media templates
- Website designs
- Advertising graphics
- Reusable layouts
Smart Objects can help protect the original content and make repeated editing easier.
7. Duplicate Before Making Major Changes
A simple Photoshop trick is to duplicate your original layer before performing major edits.
You can duplicate a layer using:
Ctrl + J
This creates a copy that can be preserved while you experiment with the duplicate.
If something goes wrong, you can hide or delete the edited layer and return to the original.
This is particularly useful when learning new editing techniques.
8. Use Select Subject for Faster Selections
Photoshop provides intelligent selection capabilities that can identify the main subject in an image.
This can save time when you need to isolate:
- People
- Animals
- Products
- Vehicles
- Objects
After creating a selection, you can refine it using tools such as Select and Mask or a Layer Mask.
Automated selection is especially helpful for beginners who may find detailed manual selections difficult.
9. Improve Background Removal
Background removal is a common Photoshop task.
You can use several techniques depending on the image.
Useful options include:
- Select Subject
- Object Selection Tool
- Quick Selection Tool
- Pen Tool
- Layer Masks
- AI-powered selection features
For simple backgrounds, automated selection can work quickly.
For complicated areas such as hair, transparent objects, or detailed edges, manual refinement may produce better results.
10. Use the Remove Tool for Unwanted Objects
The Remove Tool can help clean up photographs.
You can use it to remove distractions such as:
- Small objects
- Background people
- Wires
- Spots
- Unwanted details
AI-assisted removal can make this process faster.
However, always zoom in and inspect the edited area afterward.
Automated tools may occasionally create unusual textures or patterns, particularly when the background is complicated.
11. Learn Professional Retouching Techniques
Good photo retouching should improve an image without making it look unnatural.
Useful tools include:
- Healing Brush
- Clone Stamp
- Remove Tool
- Dodge Tool
- Burn Tool
- Adjustment Layers
- Layer Masks
For portrait photography, avoid excessive skin smoothing.
Natural texture can make a photograph look more realistic and professional.
12. Use the Clone Stamp Carefully
The Clone Stamp Tool copies pixels from one area to another.
It can be useful for:
- Repairing old photographs
- Removing objects
- Rebuilding backgrounds
- Cleaning image imperfections
When using the Clone Stamp, sample from an area that matches the texture and lighting of the destination.
Changing the sample point regularly can help prevent repetitive patterns.
13. Use the Healing Brush for Skin Retouching
The Healing Brush can blend sampled pixels with surrounding areas.
It is useful for correcting small imperfections such as:
- Blemishes
- Spots
- Dust
- Minor skin imperfections
Use a soft brush and work with small strokes.
Large edits can make the image appear artificial.
14. Improve Images With Selective Editing
You do not always need to edit the entire image.
Selective editing allows you to target specific areas.
For example, you can:
- Brighten a face
- Darken a background
- Increase color in the sky
- Reduce saturation in one area
- Sharpen important details
Layer masks and adjustment layers make this technique easier.
Selective editing often creates a more controlled and professional result than applying one adjustment to the entire image.
15. Use Clipping Masks
Clipping Masks allow one layer to affect another layer.
They are useful for:
- Applying colors to text
- Creating product designs
- Adding textures
- Creating photo effects
- Designing graphics
Clipping masks can make complex Photoshop designs easier to manage because different elements remain separated into individual layers.
16. Use Blend Modes
Blend Modes control how one layer interacts with the layers beneath it.
Commonly used blend modes include:
- Multiply
- Screen
- Overlay
- Soft Light
- Color
- Luminosity
For example, Multiply can help create realistic shadows, while Screen can create brighter effects.
Experimenting with Blend Modes is a useful way to discover new creative techniques.
17. Use Generative Fill Carefully
Modern Photoshop includes AI-powered features that can assist with image editing.
Generative Fill can help users add, remove, or modify content using natural-language instructions.
Potential uses include:
- Adding objects
- Removing objects
- Changing parts of a scene
- Extending compositions
- Exploring creative concepts
AI tools can save significant time, but generated results should always be reviewed.
Look for:
- Strange details
- Incorrect shadows
- Distorted objects
- Repeated patterns
- Unrealistic textures
AI should assist the editing process rather than replace careful review.
18. Try Generative Expand
Generative Expand can be useful when an image needs a larger canvas.
For example, a photograph may have a portrait orientation while your design requires a wider banner.
You can expand the canvas and use AI-generated content to fill the additional space.
This can be useful for:
- Website banners
- Social media designs
- Advertisements
- Presentation graphics
- Marketing content
Always inspect generated areas carefully before publishing.
19. Use Guides and Grids for Better Design
Guides and grids can help create cleaner layouts.
They are especially useful for:
- Posters
- Web graphics
- Social media designs
- Advertisements
- Business graphics
Using guides can help align text, images, logos, and other elements.
Good alignment can make a design look more professional even when the overall design is simple.
20. Keep Your Layers Organized
Large Photoshop projects can quickly become difficult to manage.
Use descriptive layer names such as:
- Background
- Main Product
- Logo
- Heading
- Shadow
- Color Correction
You can also group related layers into folders.
For example:
Social Media Design
- Background
- Product
- Text
- Logo
- Effects
Organized layers make future editing much easier.
21. Use Non-Destructive Editing
Non-destructive editing means making changes in a way that preserves the original content.
Useful techniques include:
- Layer Masks
- Adjustment Layers
- Smart Objects
- Smart Filters
- Duplicate Layers
This workflow is especially important for professional projects.
If a client asks for a change later, you can modify the existing design instead of starting again.
22. Use Smart Filters
Smart Filters can be applied to Smart Objects while maintaining flexibility.
This allows you to experiment with effects without permanently changing the original content.
Smart Filters are useful for:
- Blur
- Sharpening
- Artistic effects
- Creative effects
- Image corrections
You can later adjust or remove the filter when necessary.
23. Learn to Resize Images Correctly
Image resizing is important when preparing content for websites, social media, printing, or other platforms.
Before resizing an image, consider:
- Final dimensions
- Resolution
- Aspect ratio
- File format
- Intended use
Avoid stretching images unnecessarily because this can distort subjects.
Maintaining the correct aspect ratio usually produces better results.
24. Choose the Right File Format
Photoshop supports many file formats.
Common formats include:
- PSD
- JPEG
- PNG
- TIFF
- WebP
PSD is useful for keeping an editable Photoshop project with layers.
JPEG is commonly used for photographs and online images.
PNG is useful when transparency is required.
Choose the format based on how the final image will be used.
25. Optimize Images for Websites
Large image files can slow down websites.
When preparing images for online use, consider:
- Image dimensions
- Compression
- File format
- Image quality
- File size
A high-quality image does not always need to be extremely large.
Optimizing images can help balance visual quality and website performance.
Photoshop Tips for Beginners
Beginners should avoid trying to learn everything at once.
Start with these fundamentals:
- Learn the Photoshop workspace.
- Understand layers.
- Practice selections.
- Learn layer masks.
- Use adjustment layers.
- Practice cropping and resizing.
- Learn basic retouching.
- Explore keyboard shortcuts.
- Practice background removal.
- Experiment with simple designs.
Practice is more important than memorizing every feature.
Photoshop Tips for Professionals
Professionals can improve efficiency by building consistent workflows.
Useful practices include:
- Creating templates
- Using Smart Objects
- Organizing layers
- Using keyboard shortcuts
- Saving reusable assets
- Creating consistent file structures
- Using non-destructive editing
- Automating repetitive tasks
- Reviewing AI-generated edits carefully
A well-organized workflow can save significant time on large projects.
Common Photoshop Mistakes to Avoid
Beginners often make several common mistakes.
Overusing Filters
Too many effects can make an image look unnatural.
Editing Destructively
Permanently changing pixels can make future revisions difficult.
Poor Layer Organization
Unnamed layers can make complex projects confusing.
Excessive Retouching
Over-edited photographs can lose natural details.
Ignoring Image Resolution
Using incorrect dimensions can reduce image quality.
Trusting AI Without Review
AI-generated edits can contain visual errors that are not immediately obvious.
How to Practice Photoshop Effectively
The best way to learn Photoshop is through practical projects.
Try creating:
- A YouTube thumbnail
- A social media post
- A product advertisement
- A photo collage
- A poster
- A simple logo concept
- A background-removal project
- A portrait retouching project
Each project teaches different Photoshop skills.
You can also recreate simple designs from scratch to understand how professional compositions are built.
Benefits of Learning Photoshop
Learning Photoshop can provide useful creative and professional skills.
Better Photo Editing
You can improve photographs with greater precision.
Faster Design Work
Keyboard shortcuts, templates, and organized workflows can save time.
Creative Flexibility
Photoshop supports photography, graphic design, digital art, marketing, and many other creative activities.
Professional Opportunities
Photoshop skills can be useful for photographers, designers, marketers, content creators, and freelancers.
AI-Assisted Creativity
Modern Photoshop features can help accelerate certain creative and editing workflows.
The Future of Photoshop Editing
Photoshop is continuing to evolve as artificial intelligence becomes more integrated into creative software.
Future Photoshop workflows may include more advanced:
- Generative editing
- Object recognition
- Automated retouching
- Background generation
- Image restoration
- Design assistance
- Creative automation
These developments could make complex editing tasks easier while still requiring human creativity and judgment.
Conclusion
Adobe Photoshop tips and tricks can make photo editing and graphic design significantly easier for both beginners and professionals.
The most important skills include understanding layers, using layer masks, working with adjustment layers, mastering selections, learning keyboard shortcuts, organizing projects, and using non-destructive editing techniques.
Modern AI-powered Photoshop features can further accelerate tasks such as object removal, background editing, image expansion, and creative experimentation. However, users should always review AI-generated results carefully and maintain control over the final image.
Beginners should focus on learning the fundamentals instead of trying to master every Photoshop tool immediately. Professionals can improve efficiency by combining advanced features with organized workflows, reusable templates, Smart Objects, and automation.
With regular practice, Photoshop can become a powerful tool for creating professional photographs, marketing graphics, social media content, digital artwork, and business designs.
The key to mastering Adobe Photoshop is not simply knowing more tools—it is knowing how to combine the right tools efficiently while maintaining creative control and producing clean, professional results.