Introduction
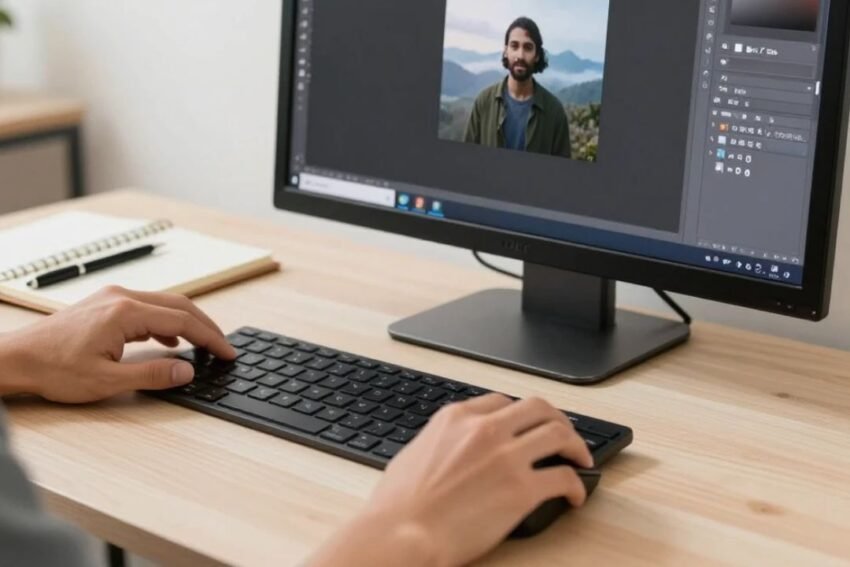
Learning Photoshop editing techniques for beginners can seem difficult at first because Adobe Photoshop includes a large number of tools, panels, menus, and editing features. However, beginners do not need to learn everything at once. By understanding a few essential tools and following a simple editing workflow, anyone can start improving photographs and creating professional-looking designs.
Photoshop can be used for many different purposes, including photo enhancement, portrait retouching, background removal, color correction, graphic design, social media content, product photography, and creative artwork.
The key is to understand what each tool does and when to use it. Beginners should also learn non-destructive editing techniques so that changes can be modified or reversed later.
This guide explains practical Photoshop editing techniques for beginners, including layers, selections, cropping, color correction, retouching, masking, background editing, sharpening, and AI-assisted tools.
What Is Photoshop Editing?
Photoshop editing involves changing or improving digital images using Adobe Photoshop.
Editing can range from simple adjustments to advanced image manipulation.
Common Photoshop editing tasks include:
- Cropping photographs
- Adjusting brightness
- Correcting colors
- Removing unwanted objects
- Retouching portraits
- Replacing backgrounds
- Creating composites
- Adding text
- Applying creative effects
- Preparing images for websites and social media
The best way to learn is to begin with basic techniques and gradually introduce more advanced tools.
1. Understand the Photoshop Workspace
Before editing photographs, beginners should become familiar with the Photoshop workspace.
Important areas include:
- Toolbar
- Options Bar
- Layers Panel
- Properties Panel
- History Panel
- Canvas
- Menus
- Document Tabs
The Toolbar contains many of the tools used for editing.
The Layers Panel is particularly important because it allows you to organize different elements of a project.
Learning where essential tools are located can make Photoshop much easier to use.
2. Open and Save Images Correctly
Start by opening your image in Photoshop.
Before making significant changes, save a working copy.
For professional projects, keeping the original file separate can prevent accidental loss of important information.
The PSD format can preserve:
- Layers
- Masks
- Adjustment Layers
- Smart Objects
- Text
- Editing information
When the project is complete, you can export a separate version for your intended use.
3. Learn How Layers Work
Layers are one of the most important Photoshop concepts.
A layer works like a separate transparent sheet that can contain image information, text, effects, or adjustments.
You can create separate layers for:
- Backgrounds
- Objects
- Text
- Retouching
- Effects
- Adjustments
Using separate layers makes your project easier to modify.
For example, if you create a text layer separately from a photograph, you can change the text without affecting the photograph.
4. Use Adjustment Layers
Adjustment Layers are highly useful for beginners.
They allow you to change image properties without permanently modifying the original pixels.
Useful Adjustment Layers include:
- Brightness/Contrast
- Levels
- Curves
- Exposure
- Hue/Saturation
- Color Balance
- Black & White
- Selective Color
If you make an adjustment that you do not like, you can modify or delete the Adjustment Layer.
This makes the workflow safer and more flexible.
5. Crop and Straighten Images
Cropping is one of the easiest Photoshop editing techniques.
Use the Crop Tool to remove unnecessary areas and improve composition.
Cropping can help:
- Focus attention on the subject
- Remove distractions
- Improve framing
- Change aspect ratio
- Prepare images for social media
You can also straighten tilted photographs.
A correctly aligned horizon can make a photograph look much more polished.
6. Resize Images for Different Platforms
Different platforms require different image dimensions.
A website image may need different dimensions from a social media post or printed photograph.
When resizing:
- Open the image-size controls.
- Set the required dimensions.
- Maintain the aspect ratio when appropriate.
- Choose a suitable resolution.
- Preview the result.
Avoid stretching images because it can distort people and objects.
7. Adjust Brightness and Contrast
Brightness and contrast are fundamental image adjustments.
If a photograph looks too dark, you may need to increase its brightness or recover shadow detail.
If it looks flat, increasing contrast can create stronger separation between dark and bright areas.
However, extreme adjustments can remove details.
Use small changes and review the image carefully.
8. Learn Curves
Curves may look complicated at first, but they are extremely useful.
The Curves tool allows you to control tonal values across an image.
You can use it to:
- Brighten shadows
- Darken highlights
- Increase contrast
- Create a softer appearance
- Correct color casts
Beginners can start by making small adjustments rather than creating complicated curves.
With practice, Curves can become one of the most powerful editing tools in your workflow.
9. Correct Image Colors
Color correction helps make an image look more balanced.
Common color problems include:
- Too much yellow
- Too much blue
- Green color casts
- Excessive saturation
- Dull colors
Useful tools include:
- Color Balance
- Hue/Saturation
- Curves
- Levels
- Camera Raw
Start with the overall color balance before making targeted color adjustments.
10. Use the Selection Tools
Selections allow you to isolate specific areas of an image.
Photoshop offers tools such as:
- Marquee tools
- Lasso tools
- Quick Selection
- Object Selection
- Magic Wand
Selections can be used to:
- Change object colors
- Remove backgrounds
- Apply effects
- Move objects
- Create masks
Beginners should practice making selections around simple objects before attempting complex subjects.
11. Use Select Subject
Select Subject can help beginners quickly isolate the main subject.
This can be useful when working with:
- People
- Animals
- Products
- Vehicles
- Objects
After creating the initial selection, refine it using selection and masking tools.
Automatic selection can save time, but always inspect the edges.
12. Learn Layer Masks
Layer Masks are essential for professional editing.
A mask allows you to hide or reveal parts of a layer without permanently deleting them.
For example, you can use a mask to:
- Remove a background
- Apply an adjustment to a face
- Blend two photographs
- Hide part of an effect
This is much safer than permanently erasing image information.
Learning masks is one of the biggest steps toward more advanced Photoshop editing.
13. Remove Unwanted Objects
Photographs often contain distracting elements.
Photoshop offers tools that can help remove unwanted objects, including:
- Remove Tool
- Healing Brush
- Clone Stamp
- Content-Aware Fill
- Patch Tool
For small distractions, the Remove Tool or Healing Brush may be enough.
For complex backgrounds, you may need to combine several techniques.
Always inspect the final result for repeated textures or unnatural patterns.
14. Use the Healing Brush
The Healing Brush is particularly useful for portrait editing and small corrections.
It can help remove:
- Temporary blemishes
- Dust
- Small marks
- Minor distractions
The Spot Healing Brush can be convenient for quick fixes.
Avoid using heavy retouching across the entire face because excessive editing can remove natural skin texture.
15. Learn the Clone Stamp Tool
The Clone Stamp gives you manual control over pixel replacement.
You select a clean source area and paint it over an unwanted area.
It is useful for:
- Removing objects
- Repairing damaged photographs
- Rebuilding backgrounds
- Cleaning product images
The technique requires patience because you need to match texture and lighting carefully.
16. Practice Background Removal
Background removal is a valuable skill for beginners.
It is commonly used for:
- Product photos
- Portraits
- Advertising
- E-commerce
- Social media graphics
A simple workflow is:
- Select the subject.
- Refine the selection.
- Create a Layer Mask.
- Place the new background underneath.
- Adjust colors and lighting.
- Add realistic shadows when necessary.
Careful edge refinement is especially important around hair and fine details.
17. Learn Portrait Retouching
Portrait retouching should be subtle.
Beginners can start with simple tasks such as:
- Removing temporary blemishes
- Cleaning distracting objects
- Improving overall exposure
- Correcting skin color
- Enhancing eyes carefully
Avoid extreme skin smoothing.
Professional portrait editing should preserve natural texture and recognizable features.
18. Use Dodge and Burn
Dodge and Burn are useful techniques for controlling light and shadow.
Dodging makes selected areas brighter, while burning makes areas darker.
They can be used to improve:
- Facial structure
- Product shape
- Clothing
- Highlights
- Shadows
Beginners should practice on a separate layer or use a non-destructive workflow when possible.
19. Improve Image Sharpness
Sharpening can make details appear clearer.
Photoshop provides several sharpening options.
Common methods include:
- Smart Sharpen
- Unsharp Mask
- High Pass techniques
Use sharpening carefully.
Too much sharpening can produce:
- Harsh edges
- Halos
- Noise
- Artificial textures
Sharpening should be appropriate for the final image size.
20. Reduce Image Noise
Noise can appear in photographs captured at high ISO or in low-light conditions.
Noise reduction can help produce cleaner images.
However, too much noise reduction can make photographs look overly smooth.
Maintain a balance between:
- Noise
- Texture
- Detail
- Sharpness
21. Use Smart Objects
Smart Objects allow you to work more flexibly with image elements.
They can be useful for:
- Transformations
- Templates
- Product designs
- Repeated elements
- Smart Filters
If you need to resize or transform an element multiple times, Smart Objects can provide a more flexible workflow.
22. Experiment With Blending Modes
Blending Modes determine how layers interact.
Some commonly used options include:
- Multiply
- Screen
- Overlay
- Soft Light
- Color
- Luminosity
They can be used to create:
- Light effects
- Texture overlays
- Shadows
- Color effects
- Creative compositions
Beginners can experiment with different modes while keeping the layer separate from the original image.
23. Add Text and Typography
Photoshop is also useful for creating graphics containing text.
Text can be added to:
- Posters
- Social media posts
- Advertisements
- Website banners
- YouTube thumbnails
Good typography requires attention to:
- Font choice
- Size
- Spacing
- Alignment
- Contrast
The text should remain readable and support the purpose of the design.
24. Try Basic Color Grading
After correcting an image, beginners can experiment with creative color grading.
Color grading can create moods such as:
- Warm
- Cool
- Cinematic
- Vintage
- Dramatic
Useful tools include:
- Color Balance
- Curves
- Gradient Map
- Selective Color
Use subtle adjustments at first.
25. Explore AI-Assisted Photoshop Editing
Modern Photoshop workflows increasingly include AI-assisted features.
These can help with tasks such as:
- Object selection
- Background editing
- Object removal
- Image expansion
- Generative editing
AI tools can save time, particularly when completing repetitive tasks.
However, beginners should inspect AI results rather than assuming they are perfect.
Unexpected details or inconsistencies may sometimes require manual correction.
Common Photoshop Mistakes Beginners Should Avoid
Editing Directly on the Original
Use copies, Adjustment Layers, masks, and Smart Objects when appropriate.
Excessive Saturation
Strong colors can quickly make a photograph look unnatural.
Over-Retouching
Do not remove all natural texture from portraits.
Poor Selections
Rough edges can make background replacements obvious.
Too Much Sharpening
Excessive sharpening can create halos.
Using Too Many Effects
A simple, controlled edit is often more effective than an image filled with effects.
Ignoring the Original
Always compare the edited version with the original to determine whether the changes actually improve the photograph.
A Simple Photoshop Editing Workflow for Beginners
Beginners can follow this process for most photographs.
Step 1: Open the Image
Start with a high-quality original whenever possible.
Step 2: Save a Working Copy
Keep the original photograph safe.
Step 3: Crop and Straighten
Improve composition.
Step 4: Correct Exposure
Adjust brightness, highlights, shadows, and contrast.
Step 5: Correct Colors
Fix white balance and unwanted color casts.
Step 6: Remove Distractions
Use healing, cloning, or removal tools.
Step 7: Retouch
Make subtle improvements.
Step 8: Add Creative Adjustments
Apply color grading or other effects.
Step 9: Sharpen
Prepare the image for its intended output.
Step 10: Compare and Export
Review the image before exporting the final version.
Best Way to Practice Photoshop Editing
Practice is one of the fastest ways to improve.
Start with simple projects.
For example:
Week 1: Learn layers, cropping, resizing, and basic adjustments.
Week 2: Practice selections, masks, and background removal.
Week 3: Learn color correction, retouching, and object removal.
Week 4: Practice compositing, color grading, and creative effects.
After learning the basics, recreate simple editing styles from photographs you admire.
The goal is not simply to copy an effect but to understand how the effect was created.
Future of Photoshop Editing
The future of Photoshop editing will likely involve increasing levels of AI assistance and automation.
Emerging workflows may make it easier to:
- Select complex objects
- Correct colors
- Retouch photographs
- Remove distractions
- Expand images
- Replace backgrounds
- Create new visual elements
However, traditional editing knowledge will remain important.
Understanding layers, masks, color, lighting, composition, and image quality allows users to evaluate automated results and make better creative decisions.
Conclusion
Learning Photoshop editing techniques for beginners does not require mastering every Photoshop feature. Beginners can build a strong foundation by learning essential tools such as Layers, Adjustment Layers, Crop, Curves, selections, Layer Masks, Healing Brush, Clone Stamp, Smart Objects, and blending modes.
A good editing workflow starts with simple corrections before moving into detailed retouching and creative effects. Non-destructive editing should be used whenever practical because it makes projects easier to revise and experiment with.
AI-assisted Photoshop features can make many tasks faster, but they should be treated as helpful tools rather than replacements for editing knowledge and creative judgment.
The most important skill is learning why an adjustment is needed and understanding how different tools affect an image.
With regular practice, patience, and a structured workflow, beginners can develop professional Photoshop editing skills and gradually move from basic photo corrections to advanced retouching, compositing, color grading, and creative design.